It’s an old saying in the cycling community that “the most expensive bicycle is the one that sits unridden because it doesn’t fit the rider.”
When I was middle school age, I can remember some of my friends getting bikes that were so oversized that their parents would attach blocks of wood to the pedals so they could reach them. Since most of them had high, squeaky voices, I can only assume that the bikes standover height was equally out of proportion to the rider.
I bought a couple of bikes in my 20s from yard sales. When you are young and flexible, about the only “fit” is, “does the top bar contact my soft parts in a negative manner?”
My Trek and I are showing our age
I bought a used Trek 1220 that “mostly” fit me several years ago and it has served me well for many thousands of miles. It’s beginning to have mechanical problems, though, and so am I.
Now that I have retired and have started this blog, I want to do some multiple-day rides on a bike that is dependable and comfortable.
A Surly Long Haul Trucker caught my eye…
…when I was back home in Missouri. The phreds, folks who ride bikes all over the world for months and years at a time have very good things to say about it.
Just about the time I was doing serious research, a buddy said he was getting tired of stumbling over his Cannondale T800 on the way to the dining room table. He already had two bikes in his living room and three (not counting the two bents chained outside) was a bit much. (Do I need to mention that he’s single?)
He offered me a deal that was either too good to be true (one source) or about $100 too much (from another). The real question was, did it fit or could it be made to fit? I described my first ride here.
It was time for a formal fitting
The Racer’s Edge, in Boca Raton, was the closest Surly dealer and they also do bike fits. To be honest, I wasn’t completely comfortable with a shop that sounded like it catered to go-fast riders and their web site reinforced that image by saying “We are a full service cycling shop specializing in high performance racing equipment. We also sponsor five championship mountain, tri, and road teams.” Way too much testosterone for me, I thought.
John Palmquist made me feel comfortable
Son Matt came and hovered to document the fitting process. I brought along my Trek and the Cannondale and I have to give Fitter John Palmquist credit. He didn’t recoil in horror when I wheeled my bike past wheels that cost more than my whole bike.

It starts out with questions
Q: What kind of riding do you do, solo or group? Florida flats or mountains?
A: Solo. Most folks are either way faster than I am or slower, so I shake out by myself. Mostly flatland, but I did get in some rolling hills a couple of months ago. 300 feet up, 300 feet down, no mountains with long, high climbs.
Are you comfortable after a long ride?
Q: At the end of your longer rides, are you comfortable or do you have aches and pains?
A: About nine months ago, I started getting the sensation of having a pebble under my middle toes. Finally, after changing pedals, cleats and shoes, I went to an orthopedist to see if I needed new inserts. He said that I had developed arthritis in my big toes, which was throwing off my gait (and pedaling), causing the discomfort.
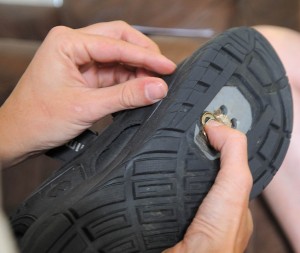 A closer look at my shoes
That’s when he asked to take a look at my Shimano Sandals equipped with Crank Brothers Candy C Pedal cleats.
“You might be more comfortable with a less comfortable walking shoe, but one with a stiffer sole so it spreads the pressure over more of your foot,” he suggested.
“I really don’t want walk-like-a-duck shoes and I ride in the rain from time to time and like shoes that don’t get soggy,” I countered.
“Your cleats should be just slightly behind the ball of your foot. Millimeters, not centimeters back, like these. Do you have any knee problems?”
“From about Mile 3 to Mile 10, I have a pain in the left knee, but it goes away and doesn’t come back until around Mile 40 for about 10 miles. Move and center them if you think it’s worth trying.”
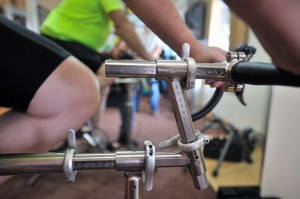 Time to get on the Size Cycle
John has been fitting bikes for about nine years. When he first started, he used the rules of thumb that most of us have read (and which frequently contradict each other). His whole approach changed when he went to a four-day class at Serotta Cycling Institute, where he learned how to use an adjustable bicycle to achieve a neutral cycling position that produces the most power while being less apt to produce injury.
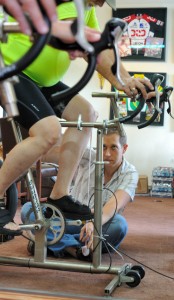 We started out with “average” settings
When I complained that I felt a little stretched out, he explained that we were going to work on getting the settings for the lower body first: saddle height, seat tube angle and saddle fore-and-aft adjustments. After that, he’d adjust for the upper body.
When I first started pedaling, the trainer made a WHIR! WHIR! WHIR! sound and I pedaled in a jerky, not round motion. It was like all of my power was on the downstroke. After warming up a bit, he started checking the bend in my knee when it was in the 3 o’clock and 9 o’clock positions and adjusting the bike.
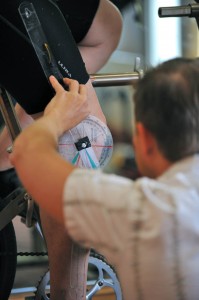 The pedal strokes started smoothing out
It was amazing how much difference the subtle changes made. Before long, the trainer started making a WHIRRRRRRRRRRRRR! sound as my strokes became more round and I was able to exert force more evenly.
He said he was shooting for about a 25-degree knee angle. He also suggested that I consider a 170-mm crank instead of the more standard 172.5 mm. The shorter crank would be easier on my knees and tests have shown that it wouldn’t reduce my power.
Time to work on upper body
Now John started to tweak the bars and stem.
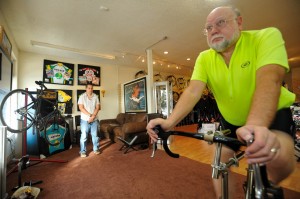
Little things didn’t escape his notice. “Are those the glasses you ride in?” he asked. “If you’re getting neck pain, you might do better in sport-specific glasses that don’t slide down and cause you to have to crane your neck.”
“You’re not in your 20s anymore and you’re not a gymnast, so I’d recommend using a short-reach bar and short-reach drops to make yourself more comfortable and to be able to make use of the drops,” he added.
The non-intrusive measurement
Two final measurements remained. Checking my shoulder width to see how wide the handlebars should be and one that he called the “least important” and non-invasive. That didn’t sound like fun.
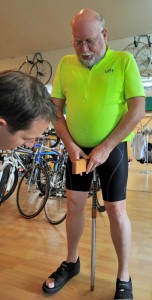 He pulled out a $260 wooden stick on a spring that I was supposed to stand over to measure my (surprise) standover height.
“Just how strong IS that spring when I let it go? I asked.
“It won’t change your voice,” he assured. Yeah, that’s what they told my buddies in middle school, too.
So, what’s the verdict?
Boiled down, my inseam is 86; my stem height is 176; stem length is 100; seat tube length is 54; seat tube angle is 73 degrees; crank arm length is 172.5; my seat should be set forward about 3mm.
Does my buddy’s used bike work?
“I’d love to sell you a new bike, but we could get the Cannondale to fit you if we replaced a couple hundred dollars worth of stuff.”
What am I going to do? I posed the question to the phreds. I’ll post some of the responses another day.
Was it worth $100 for the fitting?
I think it was. (I’ll get a discount if I end up buying a bike from them, so the hit wouldn’t be quite so bad.) In the long run, it was probably cheaper to have a pro evaluate what I need than to keep swapping out parts. Even though I have enough miles under me to be acutely aware of subtle changes in saddle height and alignment, I was really surprised to see how those tiny adjustments altered my pedalling style on the Size Cycle.
Levitra low priceom: 10px;” title=”West Palm Beach skyline from Southern Blvd. 09-22-2010″ src=”http://www.palmbeachbiketours.com/wp-content/uploads/2010/09/West-Palm-Beach-skyline-from-Southern-Blvd.-09-22-2010_7500-500×106.jpg” alt=”” width=”500″ height=”106″ />I posted some photos of a Palm Beach Full Moon ride the other day. In it I mentioned getting attacked by fire ants while shooting this photo of the West Palm Beach skyline from the Southern Blvd. causeway between Palm Beach and West Palm Beach.
 Here’s the photo I shot just as I thought someone had jabbed my ankle with a red-hot ice pick. If you’ve lived in Florida, and, I suspect, most Southern states, you know that feeling. You’ve have managed to tick off a mound of fire ants.




 It is hot.