I’ve been pretty lucky when it comes to flats (knock wood). I’ve had very few on the side of the road, and none when it was raining.
Sunset on the Lake Okeechobee Scenic Trail
 There WAS one memorable night when I was taking a newbie on a Full Moon Ride on the Lake Okeechobee Scenic Trail (LOST). Wendy and I had started in South Bay, had dinner in Clewiston and timed it perfectly to be on the second stage of the dike right at sunset.
When I made a sharp right turn and accelerated to climb the steep incline to top the dike, I noticed the sunset was spectacular and that my bike was handling squirrelly like it had a flat tire.
It DID have a flat tire
Two things happen at dusk on the LOST: the sun goes down (although I’ve never seen the fabled green flash just as it drops below the horizon) and the mosquitoes come out. I HAVE seen them. And they are legendary, not legends.
Because I don’t get many flats (knock wood), I don’t get much practice fixing flats, so I’m not very fast at it. I am less fast when I’m holding a flashlight in my mouth, wrestling a tire back on the rim and swatting monster mosquitoes with both hands and my elbows.
I put on every piece of clothing I had with me: arm warmers, leg warmers, jacket… it didn’t matter. They were biting me right through my shorts.
I can’t remember if that was Wendy’s last ride or not.
So, what DO I carry for flats?
 Being a good former Boy Scout, I carry one or two spare tubes, depending on where I’m riding; a patch kit; a Crank Brothers Speed Lever Tire Lever; a CO2 inflator and several cartridges and a pump.
I’ve read a lot about the Topeak Road Morph G Bike Pump with Gauge, so I ordered one for my Surly Long Haul Trucker to replace one that was “OK,: but took a lot of pumping.
59 of 70 Amazon reviews were 4 or 5 of 5
A quick search of the touring group archives and other reviews made it clear that the Topeak Road Morph G with gauge was a good choice. It is a long-barreled pump that throws a good volume of air into the tire with each stroke, it has a (flimsy-feeling) foot rest and it connects to the tire with a hose, so there is less danger of damaging the tire valve.
One person who rated it a 4 on a scale of 5 knocked it down for no manual for newbies.
Well, I’m not exactly a newbie. I’ve been to town and seen the elephant, but I made some kinda embarrassing stumbles to figuring everything out.
How does the pump mount on the bike?
 The mounting bracket is designed to take the place of a water bottle cage or attach to the bike with a pair of plastic zip ties. A couple of small rubber “bumpers” fit behind the mount to protect your bike’s finish. I was going to give them a shot of Goop to hold them in because they kept falling out, but I couldn’t find my tube. If you’re going to swap the pump between bikes, I’d be afraid those bumpers would be history in no time.
I’m a big fan of Velcro cable ties, so I used two six-inch ties instead of the plastic zip strips to attach the pump to my seat tube. They’re easier to put on, don’t require cutting and are less likely to mar my paint over time (I hope).
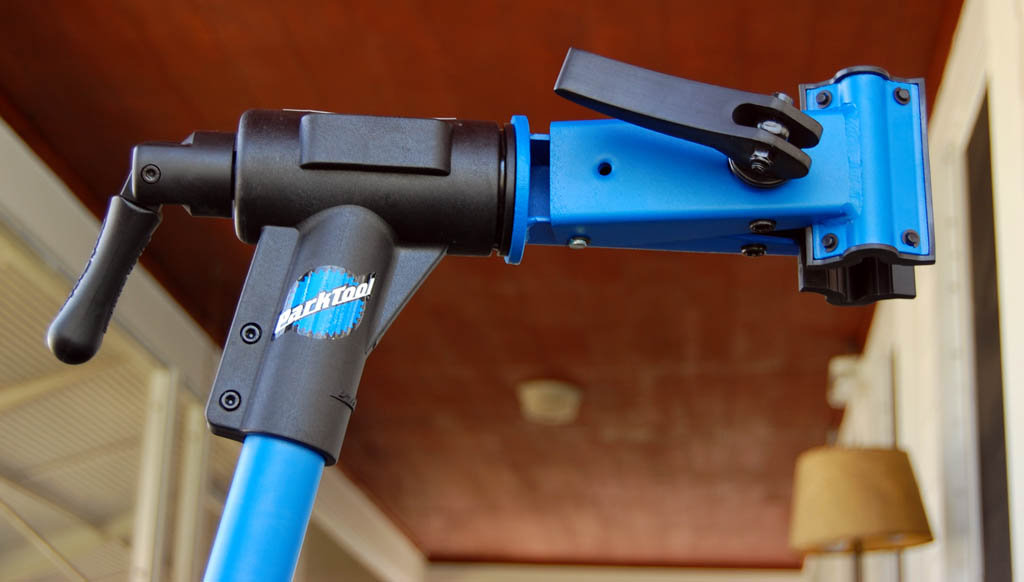
Here’s what the Road Morph looks like on the bike

One of the things I like about the Surly Long Haul Trucker is the way it’s set up with lots of room to mount things like fenders, large tires and three water bottle cages.
The pump fits nicely out of the way and the fender will keep it from getting a coating of road gunk. (Or poodle poop soup if you’re riding in Palm Beach on a rainy day.)
So, what were the stumbling blocks?
 When Mrs. Kelpe taught me in the First Grade that C-A-T spelled “cat,” I decided that I didn’t need a picture of a cat any more. Despite the fact that I made my living taking pictures, I still prefer written instructions. Unfortunately, with Topeak, you’re stuck with pictures.
Take, for example, setting up for valve types
There’s a nifty picture of how to change the pump head from Schrader valves (like you’d find on your car tires) to high-pressure Presta valves like you’d find on a road bike.
Well, I’m one of those guys who finds it easy to take things apart and not-so-easy to put them back together. Realizing that limitation, I usually like to READ the instructions first.
 I cautiously unscrewed the first piece, then even more cautiously pulled out a greasy black rubber dohickey, looked it over and put it all back together. I wanted to configure it for Schrader valves for a reason I’ll go into later.
It didn’t work.
The head wouldn’t go over the Schrader valve stem. It must ship with Presta as the default. I cautiously took it apart again and reversed the greasy black thing. It would slip over the valve now, but it wouldn’t depress the valve stem in order to let air go into the tire.
I took it apart one more time looking for the third piece in the picture. No joy.
Finally, working on the Bigger Hammer Theory of the Universe, I gave the head a rap on the table and the small point piece popped out. I reversed it and life got better.
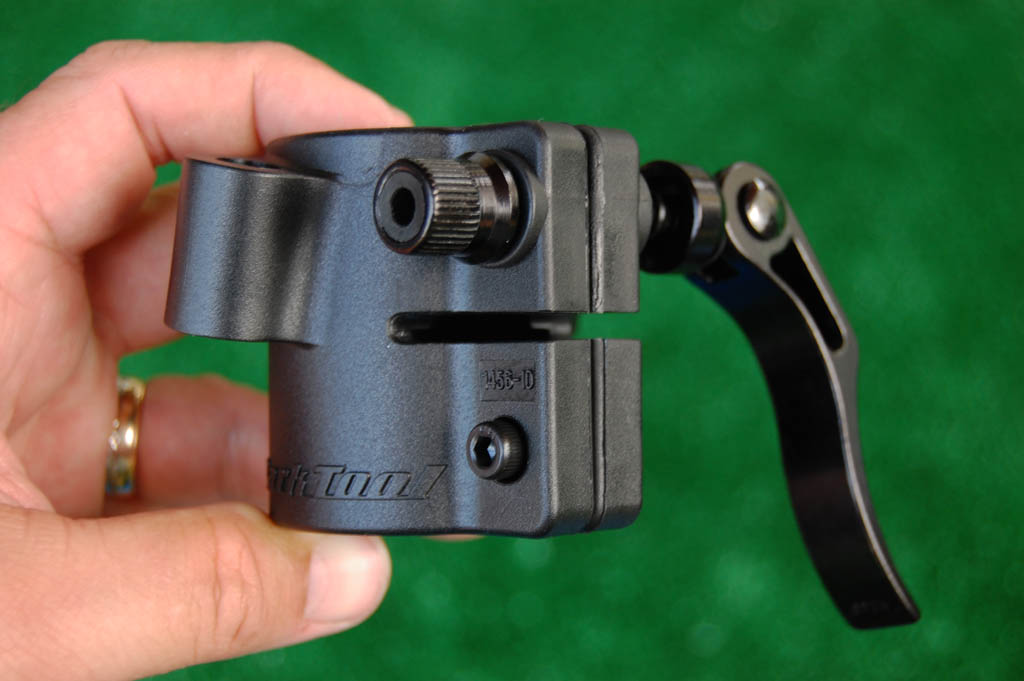
Presta to Schrader adapter
 Wayne at my LBS Bicycle won’t pump up a Presta valve directly. He always uses a Presta to Schrader adapter because he says it is less likely to damage the tire valve. I’m not as cautious, but I always have an adapter on one of my tires and a spare in my tool bag.
My old pump attached directly to the valve and put a lot of sideways pressure on it while I was pumping, so I used the adapter on it.
I could see where it would be easy to drop those small pump head parts on the side of the road, so I opted to leave the pump set up for Schrader valves. If I run across someone with Prestas, I’ll slap my adapter on their tire. (By the way, the adapter in the picture is installed upside down. I leave it that way because it’s easier to take off. I normally use a floor pump in Presta configuration when I’m at home.)
An embarrassing confession
 After hooking up the hose to my newly converted Schrader configuration Road Morph and confirming that it really pumps the tire up quickly with less strain on the valve, I went to put it back on the mount.
What the bleep?
Why won’t the hose fit neatly onto the side of the pump like it did before? It’s too long.
After looking at pictures (including ones that I had taken minutes before) I figured it out. The hose pulls out of the pump head to make it longer when you’re pumping. When you’re done, you slide it back up into the head.
I can’t be the only person left scratching his head over this.
Too bad the guy who designed the packaging material didn’t have Mrs. Kelpe for a First Grade Teacher. She’d have taught him how to explain things.


 When I rode with the Freakbike Militia last week, I didn’t notice the bike stand on Kenny Prather’s high rider until it was parked at the Northwood Village Street Party.
 The heavy-duty stand has a rubber tip on one end and plugs into a receiver welded to the bike frame on the other end.
 I built a Click-Stand holder out of a piece of light-weight PVC pipe and used Velcro to attach it to the front rack. Since then, Click-stand has come out with some nifty mounts.


 -- Perfect for Carrying Bikes and Other Outdoor Toys")
