How to Mount a Cateye Strada Computer on a Surly Long Haul Trucker

One of the members of the Surly Long Haul Trucker Google Group bought a new LHT.
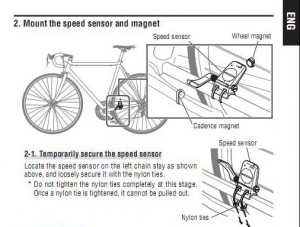
His LBS was having a hard time mounting the sensor for his Cateye V2C computer because it wanted to go where Surly puts the spare spokes.

I sent him to a page showing how my Cateye Strada Cadence computer was mounted.

Unfortunately, when I downloaded the docs for his computer, the sensor wasn’t a simple as mine. It looked like it really DID want to mount on the top of the chain stay.

I have a Cateye Strada Cadence Computer

My LBS discouraged me from buying a wireless computer. They said they have found that folks who use their bikes a lot burn batteries quickly. (I’ve been slacking off lately, so I’m afraid a battery would have lasted me a long time.) They are also prone to freaking out or going blank in an urban environment with lots of high voltage EMF floating around.

They recommended the Cateye Strada Cadence Computer.

How to mount the speed sensor on an LHT
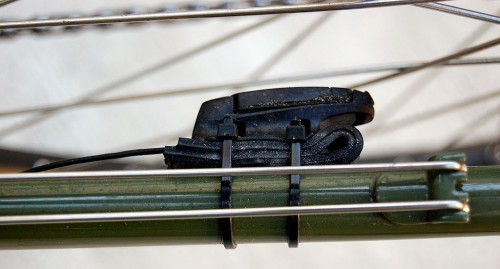
A little bit of rubber material folded up brought the speed sensor close enough that it could pick up the spoke-mounted magnet. The two small nylon ties don’t interfere with the spare spokes.

Cadence pick-up mounts the same way
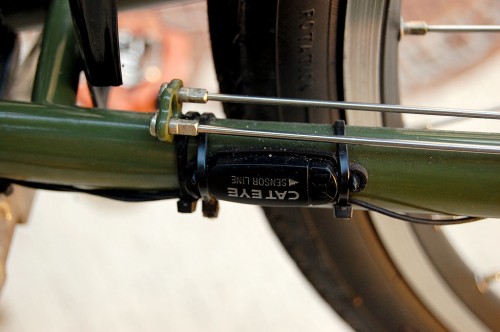
This sensor faces outward toward the crank arm and pedal. The nylon ties clear the spokes easily.

Rare earth magnets work very well
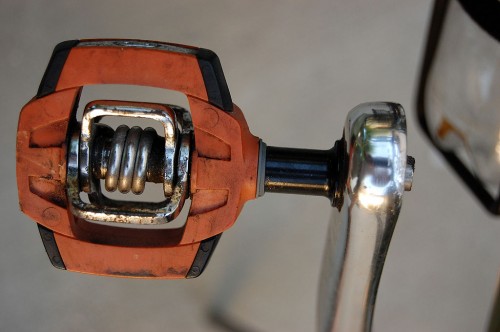
I’ve had trouble keeping magnets mounted to my crank arm when using factory-supplied parts. My kid brother, Mark, turned me on to the idea of using tiny rare earth magnets sticking onto the crank arm to trigger the sensor.

When I mounted them on my Trek 1220, I bought my first set of magnets from Radio Shack and put a drop of Marine Goop on the crank arm. (Goop is the greatest thing since sliced bread and binder twine.) It stuck for several years and thousands of miles with no issues.

Rare Earth Magnet on Candy C pedal on LHT
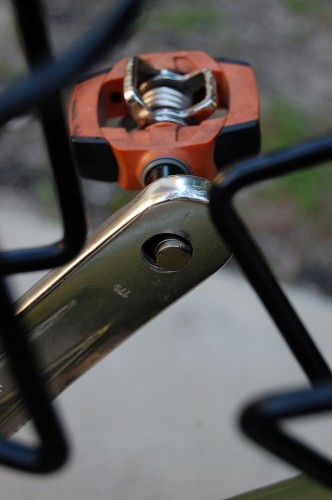
When I bought my Surly Long Haul Trucker, I found that the sensor / magnet sweet spot would let me put the magnets directly on the Crank Brothers Candy C Pedal spindle. I used two of them stacked to get them close enough for the sensor to trigger. I didn’t even bother with the Goop this time. The magnetic attraction is enough to keep them anchored to the pedal.

I also found I could buy larger, cheaper magnets from Amazon. I use the Magcraft NSN0573 3/8-Inch by 1/8-Inch Rare Earth Magnets that sell 30 for $10.99. It’s amazing h0w many ways you can use them. (Once my grandson was old enough that I didn’t have to worry about him swallowing them, we Gooped them on a bunch of his toys so he could pick them up with a toy crane.)

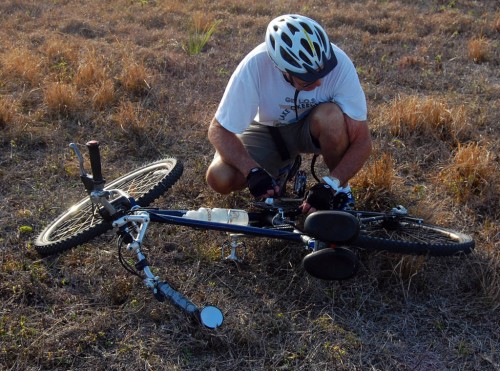
World Tire Changing Championship

Mechanical problems on the road can spoil your day. I’m going to hazard (no pun intended) a guess that flat tires are the most common ride-spoiler out there.
Iowa Bicycle Coalition hosting World Tire Changing Championship

I’m not a fast tire changer. I’m not even, as the saying goes, a half-fast tire changer. I can get the job done, but I’m not going to enter the World Tire Changing Championship at the RAGBRAI Expo in Sioux City, IA, on July 24.

For more information, including contest rules and a sponsorship flyer, go to the Iowa Bicycle Coalition website.

How to change a flat

Over time, I’ve posted some tips and reviews about what tools I carry, some pump recommendations and a how-to video.

Video of Wayne at my LBS changing a flat.

Blackburn sent me a new AirTower 2 to replace a defective TPS-2 floor pump.

How to use and mount a Topeak Road Morph Pump with Gauge.

Tools and parts I carry.

How to Change the Battery in a Garmin Nuvi 760 GPS

I bought a Garmin nüvi 760 GPS about two years ago. You can read my Turbulencetraining.com – 75% Commission & New Monthly Continuitynk to review of Garmin Nuvi 760 GPS” href=”http://www.palmbeachbiketours.com/garmin-nuvi-760-gps/” target=”_blank”>”first impressions” review here. Not long after, I signed up for a Garmin nüMaps Lifetime North America Map Updates subscription. You can read about the installation process here.

Several months ago, I noticed that the battery life was getting a little short when it wasn’t being powered by the automobile. That’s not a big deal. About the only time I have it unplugged is it I hand it to a passenger to search for something. Still, I figured I’d replace the battery if it was cheap and easy.

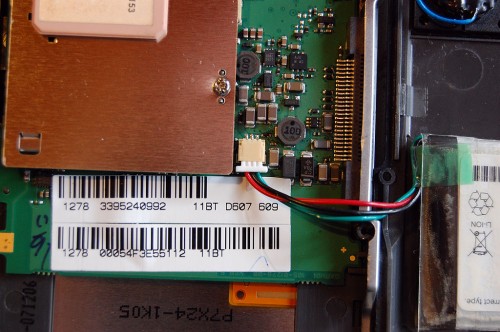
The battery is part No. 361-00019-11

I kept putting off doing anything until someone posted a part number in the Garmin Nuvi 750-760-780 Group. He said, do a search for Part Number 361-00019-11.

BINGO. I ordered from the fine folks at BatteryShip.com. The battery was $19.95 with free shipping and a set of tools. I could have gotten a similar deal through Amazon for about a buck cheaper, but I would have paid $4.99 shipping.

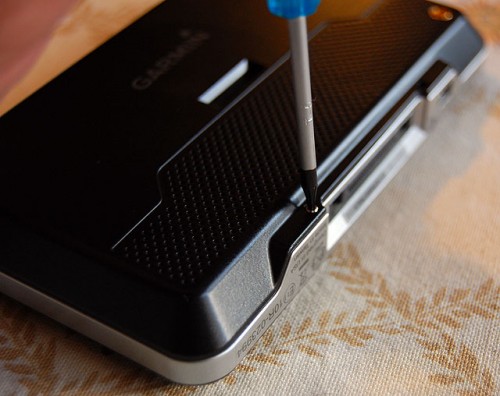
1. Unscrew the back

Remove the two screws holding the back on. This is where you’ll be glad you ordered from someone who sends tools along with the battery. Those teeny-tiny screws aren’t Phillips screws. They use the T-8 Torx driver that was in the tool kit. I don’t think I had anything that small on the workbench.

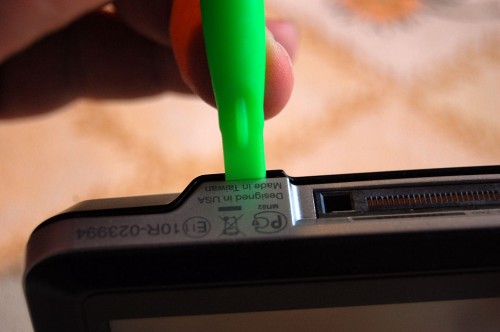
2. Pry off the back cover

Use the handy-dandy thing that probably has a special name, but I don’t know it, to pry off the back cover. The plastic widget looks like a miniature version of a tire lever. The cover has a pretty snug fit, so the tool is helpful. Be firm, but gentle and it’ll finally come off. Be careful around the on-off power switch.

When the cover finally snaps off, don’t yank too hard. The speaker and battery are attached to the cover with some fairly short wires.

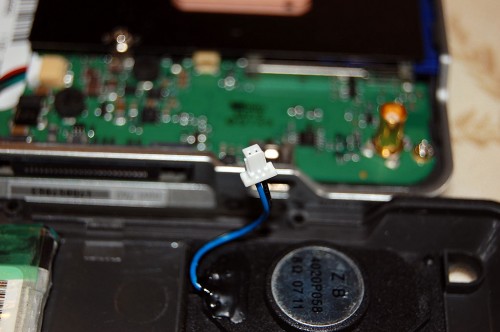
3. Unplug the blue and black speaker wires

The speaker wires are fairly short, so I unplugged those before the battery.

4. Unplug the old battery

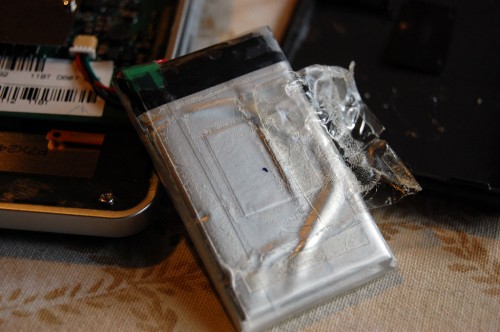
5. Pry the old battery off the back cover

The old battery is stuck to the back of the cover with two-sided tape. I saved the tape to put on the back of the new battery to keep it from moving around when I closed the case. When you’re sticking it down, the wires should be on the top, inside of the cover so they’ll reach the connection terminal.

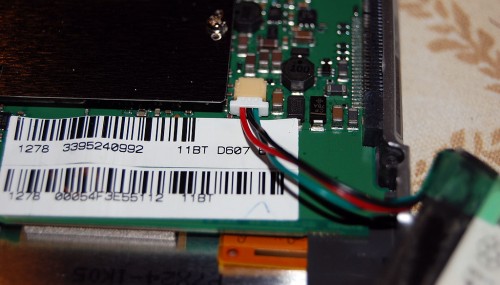
6. Plug in the new battery

The connector is keyed, so you can’t put in the wrong way. (Unless you’re a big fan of brute force.)

It’ll be less frustrating, though, if you put the red wire on the left side instead of trying it with the green wire on the left.

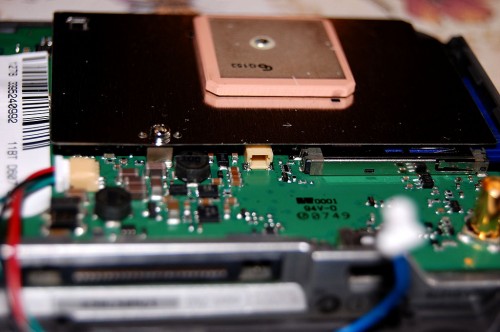
7. Plug in the speaker wire connector

The terminal for the speaker is the ivory-colored rectangular device in the middle of the frame. It’s keyed, too. I think the blue wire goes on the left, but I can’t swear to that. It’s a tiny connector on a short wire. If you have fat fingers, a pair of tweezers might be handy.

8. Pop the cover back on

Make sure you don’t have any wires trapped, pop the cover on, then replace the two screws. Life should be good.

Life WASN’T good

After snapping the back cover on, but before putting the screws in, I decided to do turn on the power switch to make sure everything was working. The switch is a spring-loaded momentary contact switch that has some resistance to it.

Usually.

This time, however, it moved freely back and forth without doing anything. It’s amazing how long you’ll try something with absolutely no hope of a changed result. I didn’t see where I had been doing anything anywhere close to where the switch lived, and I hadn’t seen any kind of cautions in anything I had read.

Sounds like a known problem with Garmin power switches

I did find some reports of other folks who had their switches fail.

The semi-good news – particularly since I’m leaving to go on a two-week road trip – is that the unit will still work when it’s plugged into the car and computer. I just can’t turn it on and off manually from the switch. That’s not a big deal. The unit will power down on its own 30 seconds after it’s unplugged (or I can press the display to tell it to stay on).

The only time I could see it being an issue is if the GPS has to be reset. If that happens, I guess I’d have to pull the back and unplug the battery.

When I get back, I’ll decide if I want to get it fixed.

The Velo-Dog, a 1900s Solution for Bad Dogs

I have a friend who is a target shooter and a collector of obscure facts about firearms.

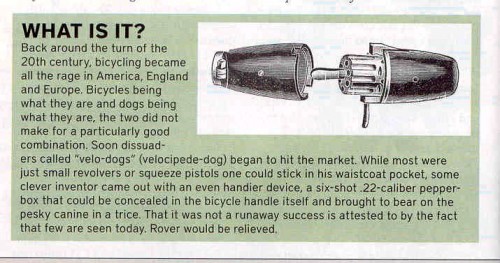
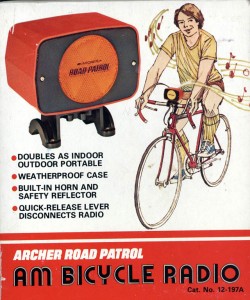
He knows I’m a biker who loads his Surly Long Haul Trucker down with every accessory known to man, woman or beast. He sent me this illustration, accompanied by the comment, “This may not be quite as cool as a Radio Shack AM radio for your handlebars but it has to be on the list somewhere…..”

I’ll stick with my Archer handle-bar AM radio.

My kids think that my music choices would scare ANYTHING away. Or put it to sleep.

I have pretty good luck with dogs. In all my years as a paperboy, photographer and cyclist, I’ve only been nipped a couple of times. It was always one of those annoying yippy dogs, never a big dog.

Bro Mark is a dog magnet who is quick to reach for his water bottle to deter chasers. I’ve found my Delta Airzound Bike Horn will cause most dogs to stop in their tracks.

It’s fun to watch a big dog in full tilt run lock his brakes and deploy the drag chute when I hit him with a HONNNKKKK!!! from the AirZound. By the time he figures out it’s not an 18-wheeler, I’m long past his chase zone.

Rear Video Camera Mount for Freakbike Ride

I’ve been slacking lately. I caught a nasty cold on Thanksgiving Day and have been fighting it ever since. I was only on the bike one day since the middle of November. I don’t even want to tell you my mileage for the year. Let’s just say it’s the lowest since I started riding in 2001.

The one ride I DID haul myself out of my sickbed to do was the Freakbike Militia’s Choppernite 26.

I want to see faces, not biker butts

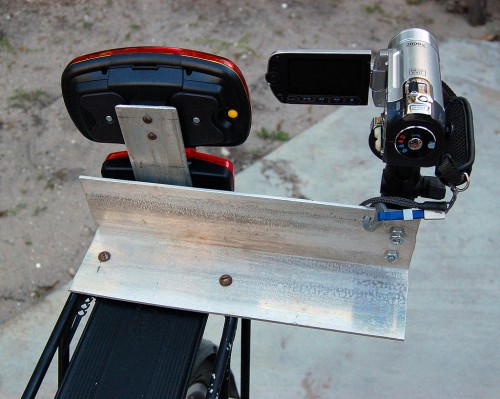
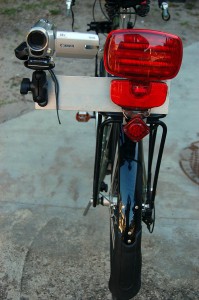
This time I wanted to shoot video of more than biker butts, so I rigged a mount that would let my Canon FS100 video camera point behind me. It’s pretty ugly and I won’t leave it on the bike all the time, but it seems secure.

It’s made out of some 1/4″ aluminum stock I used to use for radio mounts. Two 1/4″ bolts through the aluminum and big washers underneath hold it to the Jandd Expedition rear rack.

I use a RAM mount with quick release to hold the video camera. Because I’m a belt-and-suspenders kind of guy, I drilled a hole in the mount for the lanyard attached to the camera. The RAM mount is solid enough to handle this bumpy ride, but it never hurts to be safe.

I wanted it mounted slightly ahead of the RealLite so it would be less likely to pick up flare from the flashing taillight. It needed to be off to the right enough that I could open the viewfinder.

So, how did the video camera mount work?

Unfortunately, I wasn’t able to find out.

I pulled out of the driveway and noticed in the first 100 feet that a slight mist was in the air. I went back into the house to check the radar and saw a tight band of reds and yellows just off the coast and moving slowly to the southwest, in my direction.

I stuck a few Ziploc bags in my jersey pocket, took off the video camera and headed out. About two blocks from the house, the mist turned into rain, and I ducked under a building overhang to rig for bad weather. That’s when the skies REALLY opened up and the wind started howling.

I put the cameras in the plastic bags and pulled the waterproof covers over my Arkel small bar bag and Tail Rider trunk bag, dug out my Campmor rain cape and pulled on leg warmers because the winds were chilly. After about 20 minutes, the heavy rain and winds dropped off to a steady rain and I took off to the assembly point.

Stan of Wheels of Wellington shot this picture of me after the rain had slacked off and I had dropped the finger loops on the rain cape to be less like a sail. I resemble a big orange pumpkin going down the road, because I put the cape over the CamelBak M.U.L.E. I was wearing. What his photo doesn’t show is how the FlaskBak I was trying out caused the whole back of the cape to light up.

I’m one of those folks who actually likes riding in the rain. The brim of the rain cape extends out far enough that my glasses stay relatively dry and the fenders kept my legs dry except for a couple of flooded areas where I got a little water on my feet. THAT didn’t matter because I was wearing Shimano sandals.

How was Choppernite 26?

I’ve been holding off on writing this because I wasn’t sure what to say. I’ve really enjoyed the other Freakbike Militia events I’ve participated in. I went so far as saying the Summer of Love ride was the most fun group ride I’d ever been on. I said that even the motorists who were briefly inconvenienced seemed to pick up the good vibes of the ride.

I didn’t get that same good feeling on this one.

Let’s look at the good things first

  • Despite the rain, about 70 riders showed up.
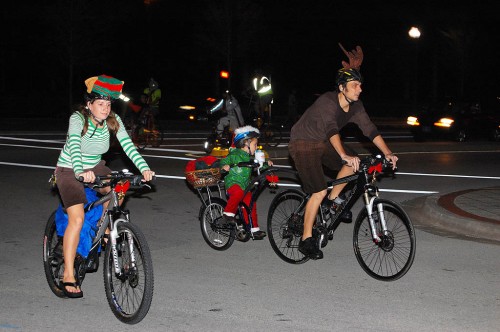
  • Many of the bikes and riders were decorated and had ingenious lighting arrangements.
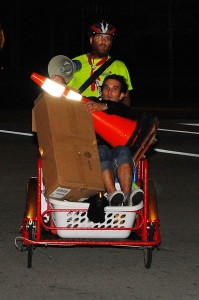
  • The “corkers” – riders wearing safety vests who blocked intersections for the group – were enthusiastic and effective. The vests are a nice safety touch.
  • The ride was raising money for a good cause.
  • The group had a lot of fun.

Things that made me uncomfortable

  • Despite earlier requests on the Freakbike Militia forum, some riders persisted in crossing the center line to ride in the lane with oncoming traffic. It’s inconsiderate, makes motorists cranky and is dangerous, particularly if the bike doesn’t have lights. Drivers are drawn to watch the spectacle going by and may not see the rider in their lane until it’s too late.
  • Too many bikes didn’t have lights. That’s not a big problem when they’re tucked in the middle of the group, but the group tends to fragment on the way back. It’s very dangerous on a rainy night when you have a mixture of lighted and unlighted bikes spread out on the roadway. If a driver is concentrating on watching the taillights, he or she can plow into an unlit bike.
  • Someone led the group to go westbound on eastbound Okeechobee from Flagler instead of a block north onto westbound Lakeview. I was set up to shoot the group going down the right street and was surprised to see everyone going the wrong way. THAT didn’t win any friends with the eastbound motorists.
  • The poor corkers caught a ration of honking when they blocked the intersection for a spread out group of riders who went the right way. It’s one thing to be stopped for 100 bikes, it’s another to be stopped for a handful.
  • To compound the problem, some of THOSE riders spilled over into the left-hand lane, igniting another chorus of honks.
  • Maybe it was because of the joyous Christmas season, but motorists seemed crankier and more impatient than usual.

Will I do another Freakbike Militia ride?

Yeah, probably. (If they’ll have me back after reading this review.)

I like the folks and this was the first bad experience I’ve had. Maybe I was just cranky because I was still half-sick; maybe the rain delay caused things to be even more disorganized than the usual a non-organized ride; maybe the motorists were in a rush to do Christmas shopping, who knows?

If I feel like the next ride is unsafe or that it’s pissing off people more than it’s promoting cycling, then I’ll have to re-evaluate.